Today we will discuss how you can publish your asp.net web application.
Please follow below step to achieve it.
Step 1:
Right Click on your project then click on Publish.
Below screen will open.

Step 2:
Click On Custom.
Below Screen will Open.
 Give Any suitable profile name.
Example : Give name "Local1"
Click On OK
Click Next.
Below screen will open.
Step 3:
 From dropdown select Publish Method.
Select File System.
When you select "File System" as Publishing method , it will ask for a Physical Path to Publish a web site.
Ex: Create a new folder in your C drive named "Demo".
Set C:\Demo as Physical Publish folder Path.
Click Next.
Below screen will open.
Step 4:

Click on Publish. Below screen will open.
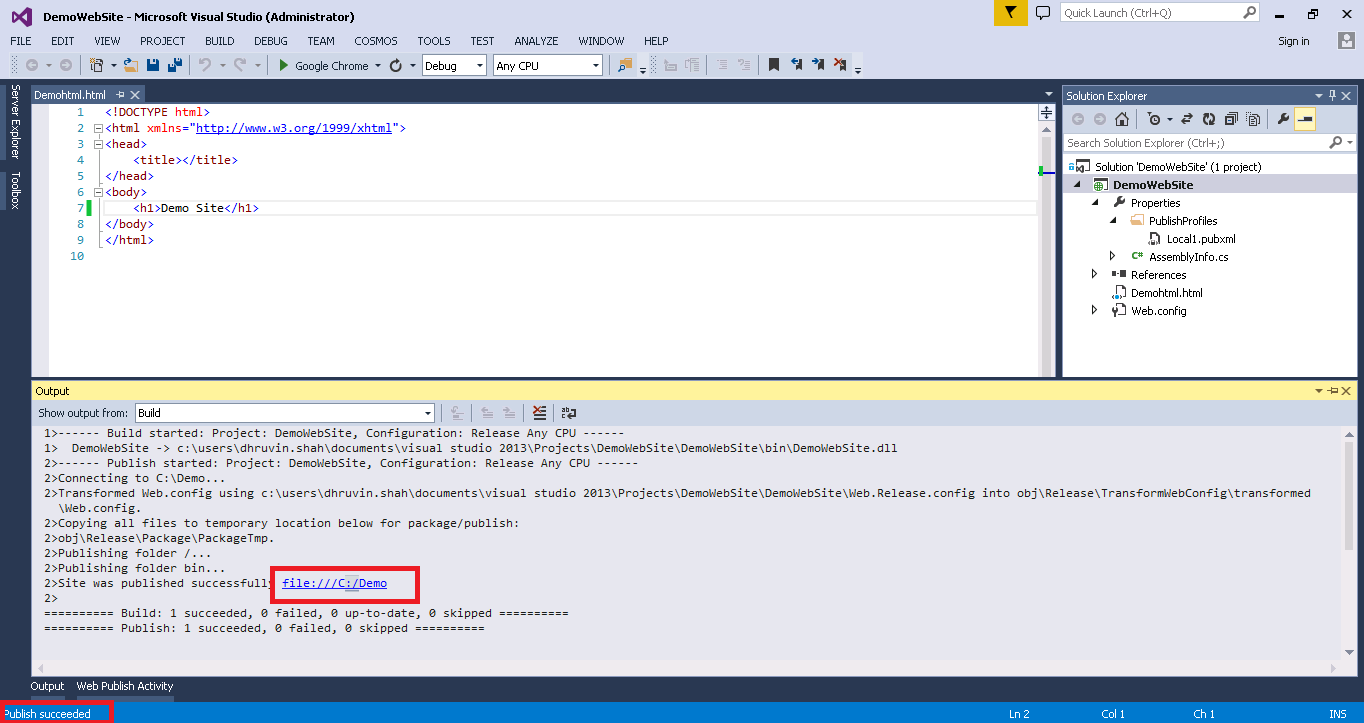
Step 5:

Your Site is successfully Published on C:\Demo Folder.
Please follow below step to achieve it.
Step 1:
Right Click on your project then click on Publish.
Below screen will open.

Step 2:
Click On Custom.
Below Screen will Open.

Example : Give name "Local1"
Click On OK
Click Next.
Below screen will open.
Step 3:

Select File System.
When you select "File System" as Publishing method , it will ask for a Physical Path to Publish a web site.
Ex: Create a new folder in your C drive named "Demo".
Set C:\Demo as Physical Publish folder Path.
Click Next.
Below screen will open.
Step 4:

Click on Publish. Below screen will open.
Step 5:
Your Site is successfully Published on C:\Demo Folder.
For More Updates stay connected On : Learn2All Facebook Page
Comments
Post a Comment