Overview
In this article, we will talk about the step-by-step procedure of migrating existing SSRS Reports to the Power BI Report Server.
Many organizations are already using SSRS reports for their organizations. For them, there is one challenge; i.e., how they can migrate their existing reports to Power BI Report Server.
The main issue in their mind is, how can they make the migration successful. This article is an answer to their questions.
For SSRS, the report server has been configured in two ways.
- Native Mode
- SharePoint Integrated Mode
Based on the mode of the existing SSRS mode, we can migrate the reports from On-Premise SSRS to Power BI report server.
In this article, we will migrate the SSRS reports from the Native Mode of SSRS to Power BI Report Server.
So, let’s get started!
Step 1
Make sure about the Source and destination Server.
To perform the migration from SSRS to Power BI Report Server, we need Local Administrator rights to perform the migration.
Step 2
Check the Source and Destination Server’s Web Portal URL by opening it.
The following screenshot shows the screenshot of the web portal of SSRS and Power BI. If you don’t know about the web portal URL of your server, open the Report Server Configuration Manager, from the web portal option we can find the option for the same.


Step 3
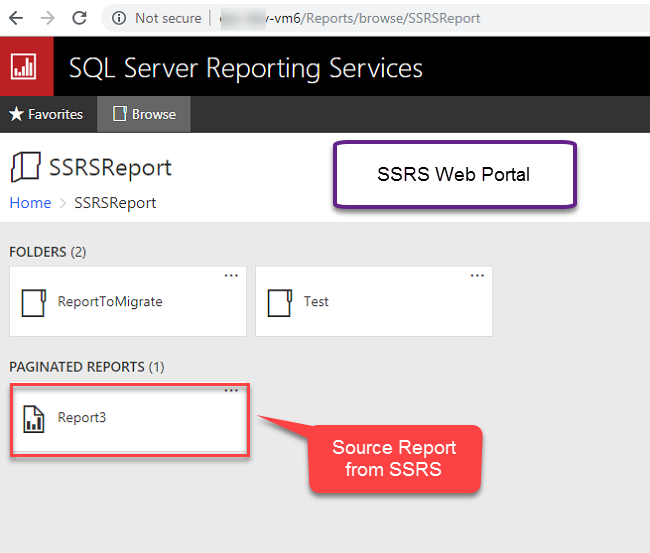
We have following SSRS report in our source. We will migrate the same report to the Power BI Report Server.

Step 4
Use the following developed script and place it in any physical location of the server. This is the OOTB migration script provided by Microsoft. We can download the file using the this URL.
Once the file is downloaded, create any folder on the hard drive and place the file within it.
Ex: We have created the folder named “rss” under the C drive. The path is – “C:\rss”

Step 5
Open the command prompt with elevated (Run as administrator) privileges.
First, change the default path of the Command prompt using the following command :
Cd C:\rss

Now, prepare the following script,
- rs.exe -i ssrs_migration.rss
- -e Mgmt2010
- -s "http://epc-dev-vm6/Reports"
- -u epcgroup50\EPCGroup
- -p EpC@#$!@2018
- -v f="/Reports"
- -v ts=" http://epc-dev-vm6:81/Reports"
- -v tu="epcgroup50\EPCGroup "
- -v tp="EpC@#$!@2018"
- -v tf="/MigratedReport"
Here,
- -s = Source Server URL
- -u = Source SSRS Server UserName
- -p = Source SSRS Server Password
- -v f = Source Folder Path for Migration
- -v ts = Target Server URL (PBIRS)
- -v tu = Target Server Username
- -v tp = Target Server Password
- -v tf = Destination folder where we can migrate the report.
rs.exe -i ssrs_migration.rss -e Mgmt2010 -s http://test-dev-vm6/ReportServer1 -v f="/SSRSReport" -v ts="http://test-dev-vm6:81/PBIReportServer" -v tf="/MigratedReport"
Here, in my case, my Power BI Report Server and SSRS Report Server are located on the same machine. So, I don’t need to add the username and password. If in your case, SSRS and PBIRS are located on different servers, then you need to add username and password for the authentication.
Step 6
Run the script in Command Prompt with elevated privileges. Press Enter Key to start the migration.

Step 7
Migration has been started successfully.

Step 8
You can find the migrated SSRS report in our Power BI Report Server.

Conclusion
This is how we can migrate the existing Power BI reports to the report server. I hope you love this article!
Stay connected with me for more amazing articles!
Comments
Post a Comment